From the past few years, spam has increased a lot. Many of us get hundreds, even thousands of unwanted emails daily. These emails are worthless, just they cover the space and fill up the inbox. What can one do to deal with it? You don’t need to worry, almost all the email services have some filters to sort messages. Being an iCloud user, you can set up rules to automatically filter incoming messages or can even reorganize old messages. Another question might strike your mind that how to block a specific email address on iCloud. For that, you need to read the whole article.
Table of Contents
What An iCloud Rule Can Do To Help You Out?
To deal with this, you just need to create a rule, the process is quite easy. The iCloud Mail will transfer all the upcoming emails from unwanted senders to the Trash folder automatically. All these emails will get automatically deleted from there. Therefore, you don’t need to worry about sorting each an every mail and deleting them manually. It really saves a lot of time.
How To Block A Sender In iCloud Mail?
If you want to block a sender in iCloud Mail, just follow the steps mentioned below:
- If you aren’t login, firstly go to iCloud Mail and log in.

- Now tap on the gear-shaped “Settings” icon present in the lower-left corner of the page.
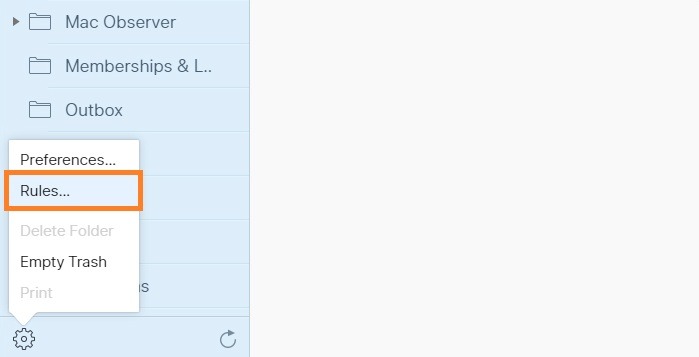
- Now, from the pop-up menu, tap on the Rules… option.
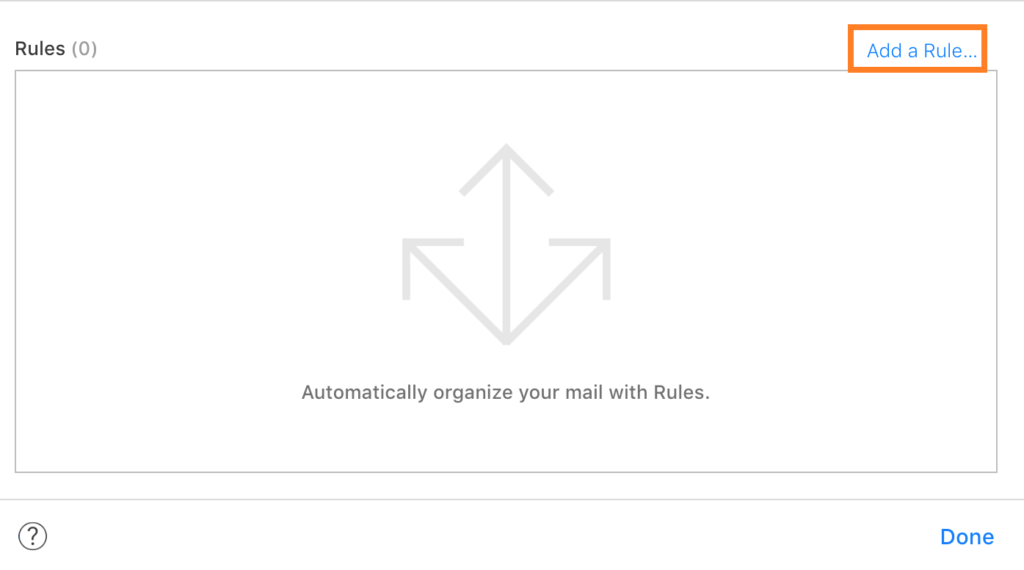
- From the Rules panel, click on Add a Rule… option.
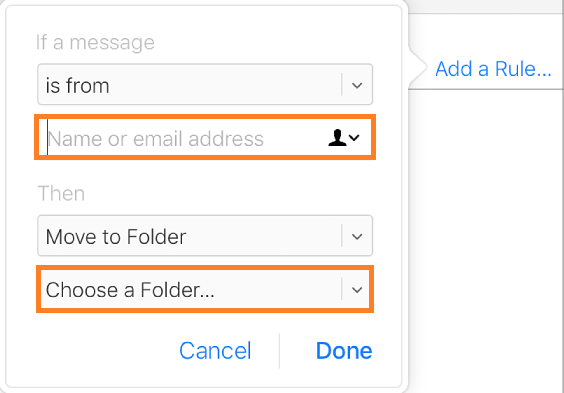
- Now you need to fill up a specific email address that you want to block, in the “is from” option under “If a message” heading.
- Now, under the “Then” option, you need to choose the “Move to Folder” option and have to select “Trash” as the folder to transfer all your unwanted messages.
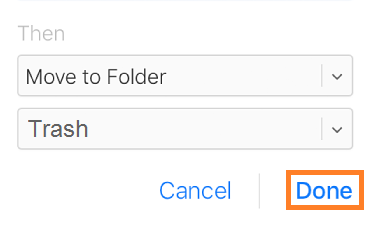
- After finishing up, just tap on the Done button, That’s it!
How To Edit Or Remove Email Filtering Rules?
If you want to edit a rule, just click on the Info button and specify new filtering conditions and tap on the Done button. To delete rules, just select the rules you want to delete and press the Delete button. Moreover, you can change the order of the rules by dragging them up or down.
Note: All the changes may take up to 15 minutes to come in effect.
I hope this article would have been helpful to you. Still, If you have any query, then you leave your comments below. I will try to answer it as soon as possible.
Also Read:
- How To Fix Android File Transfer Not Working On Mac
- How To Delete Your Spotify Account Permanently?
- Piriform Recuva: Recover Permanently Deleted Files (Free)
- Can I Play PS3 Games On PS4? | Play PS3 Games On PS4
- What Monitor Do I Have?: Find Out Monitor Specifications